
Tips + Techniques
Photo Lighting Hacks: Mental Shifts for Stand-Out Images
April 28, 2022

Light is wonderful, diverse, malleable—it’s everywhere and nowhere all at once, and it should be totally thrilling to know that making your images stand out can often be done just by making the smallest of changes here and there. How, you ask? Start by changing your mindset. Once you understand that you have far more control over both available and added light than you think, it becomes much simpler to confidently create all sorts of looks in all sorts of places with ease. That’s where my photo lighting hacks come into play.

The photo lighting hack process begins with a mental shift in your lighting approach. One of the biggest mental shifts you can make to demystify the lighting process in your photography is by thinking of light as water—find its source, follow how it changes as it gets further from its source, and follow how it changes shape as different things interfere with its path. Paying careful attention to the source and flow of light will dramatically change how much control you are able to have over it, and as a result the magic you’ll be able to make in your images.
[READ: How to Master Chiarascuro Lighting for More Atmospheric Scenes]
To get started, let’s look at the following three types of light—Open Shade, Silhouettes and Chiaroscuro—and how we can access all of them quickly using what I like to call The Orbit Method.
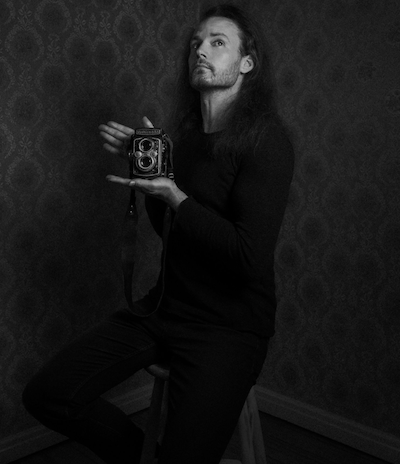
PHOTO LIGHTING HACK: THE ORBIT METHOD
Set your portrait subjects, get them doing whatever it is you get them to do, and then “orbit” them—they are the moon to your earth, or vice versa. The images below were taken all of about 5 seconds apart and I intentionally tried to cover the most amount of variety for them in the smallest amount of time.
Set your exposure for the highlights and then orbit to capture open shade, side chiaroscuro and then silhouette. Thinking of the light and your subject in terms of “orbiting” them is a simple in-the-moment habit that can be applied in just about any portrait situation.


FIND BEAUTIFUL LIGHT BY CHANGING YOUR REFERENCE POINT
You can’t change your output if you don’t change your input. The difference between making the work you’ve always made and making new work, is simply taking the effort to see new things, and draw new connections in your brain. The difference between seeing light as being boring or seeing light as something majestic can be as easy as taking an image you’ve shot, picking an artist (i.e. a painter) and asking the simple question: What would [said artist] see in this? I call this work below “Grand Theft Arto”!

This changes how you see light and how you treat it in post-production. Here’s that simple mental hack applied to a very normal morning at home, intentionally looking for light in boring places.
[READ: Rule of Thirds: How to Use it and When to Break it]
This exercise (see more examples below) might just change where you look for it when you’re in the middle of a portrait session.


GETTING IT RIGHT IN CAMERA…OR NOT?
Ten years ago, digital cameras had very little margin for error, were unreliable for focusing in challenging light, and afforded us much less room to move in post-production. Now all of that has changed, and a Canon R series will pretty much do most of the work for you. It’s very easy to imagine a future where cameras don’t even use the term ISO anymore as they’ll capture light in an as-yet un-invented way, we won’t think about exposure in the same way we do now, and noise won’t even be in our vocabulary. Same with focusing, which is already happening, and we have the ability to focus our files in post.
[READ: Aspect Ratios in Photography: A Simple Way to Enhance Your Storytelling]
What does this mean for us as photographers? Images have never been easier to get cleaner, and automatic shooting modes now do a brilliant job. Any automatic exposure mode (aperture priority, shutter priority, auto ISO) will do a pretty great job of rendering the scene as you’re seeing it. For this reason I use auto ISO nearly all the time, and control the exposure I want using exposure compensation. I get the control that I want (shutter and aperture) and ISO will fall where it needs to—perfect for weddings and documentary work. Why am I saying this? I feel like conversations around needing to shoot an image to capture light in a certain way are becoming redundant. These days I just try and get plenty of “data” in the file. Canons are now brilliant at recovering highlights, so on my R5 I mostly expose all my work in the middle so that there’s plenty of shadow detail.

The benefits of exposing close to what your final image will look like is more about saving time in the edit: in the same way that using a light meter for film work is more about frame to frame consistency to reduce editing time afterwards. For editorial work where there is a more forgiving margin for error, you can expose up or down or sideways by 2,3,4 stops, and correct it in post with minimal penalties. This can bring with it bad habits, and it might be tempting to be cavalier with our exposures. But listening to the light and getting the exposure right in-camera does mean less time correcting things in post, and that can only be a good thing.
OFF-CAMERA FLASH
For this music video (I directed the photography), I gelled a single key-light cyan and the rear one pink.
You could achieve this on-site using strobes or even speedlites. How great would that look at a wedding? In fact, here’s what it looks like below (minus the rim light) for couple Kelly and Zach below, who wanted a portrait of every single guest, red carpet style. For privacy reasons these are just a few shots here of the couple. (Special shoutout to my dear friend Lucia who traveled over to shoot these while I was taking care of the documentary side of things, taking 500 formal portraits of their guests.)

DON’T JUST CHANGE YOUR ANGLE, CHANGE YOUR FLASH’S ANGLE
When everyone is using their camera flash in its native position on camera (front), the small act of pulling it off and using it remotely from further away creates an instant point of difference. There are many flash cords that enable this, and it gives an iconic photo party/journalistic look. Plus when you’re physically taking the image with one arm outstretched, people look at you with a “WTF is he doing” face, which is a state in others that I’m an enthusiastic advocate of cultivating. Here’s this concept applied to music video stills (below) taken on Kodak Portra film with a canon Speedlite, held out at a 45-degree angle.


MAKE SPEEDLITES SIMPLE AGAIN: USE CUSTOM DIALS
The humble speedlite is beautifully diverse in what it can give you on the day. I want to share an idea (first shared on A Strange Atlas instagram HERE) that will make you have to think an order of magnitude less when shooting a reception with a single speedlite.

When entering any room, you want to be ready for three flash scenarios without ever having to think about what you’re doing, in addition to your manual setting (set to ambient). So, for example. as soon as you enter the wedding reception you are covering, set your eyes towards an unsuspecting guest and nail your three flash modes using them (by testing on an unsuspecting human as soon as you enter a room, you’ll never once have to fumble with settings).
Each mode should be as follows: a direct-flash mode for groups, a direct-flash mode with light trails for dancing shots, and a card-up bounce-flash mode for super clean images. Save each of these modes as a C1, C2, C3 Custom Dial function on your camera, remember the corresponding flash setting, and you’re good to go.
C1: for clean group shots and clean documentary coverage. Indirect bounce-flash, white card up, match aperture of F7 or higher while keeping ambient room detail. Flash set to medium power.
C2: punchy and classic: direct flash with no trails. Set flash to match aperture of F7 or higher while keeping ambient room details. Flash set to low.
C3: light trail anarchy. Set flash to match an aperture of F7 or higher and shutter speed of around 1/15th (dependant on how much ambient tungsten light there is, which can bleed too much if shutter speed is too slow), while setting ISO to keep nearly no ambient room detail. Flash set to low.
Manual: manual settings should be set to match the ambient lighting.
Tip: Using higher ISO is way better than draining your flash batteries and slowing its recycle time. ISO 6400 while using flash is not the devil.
So get in there, turn the custom dial, point the camera and click. Game changer.
Oli Sansom is the Melbourne-based wedding photographer behind the brand Briars Atlas, and was chosen as a 30 Rising Star of Wedding Photography in 2015. You can find all of the free resources and e-books he offers photographers over at strangeatlas.co.
Related Articles

Why Felix Kunze Thinks We’ve Been Overcomplicating Lighting (And What He’s Doing About It)
July 24, 2025
When it comes to lighting in photography, most of us instinctively reach for soft, flattering light. We diffuse our flashes, shoot through umbrellas, and seek out cloudy days. But what if I told you that some of the most striking portraitYou know the moment: your subject is ready, you’ve got about five feet of space to work with, and the...
More »

How to Photograph Fireworks for Couples Portraits
October 24, 2024
Fireworks aren’t just for the Fourth of July! You’ll find them regularly at theme parks, sporting events, and maybe more surprisingly, at weddings. For the latter, fireworks offer photographers a wonderful opportunity to capture epic couples portraits with a truly unique backdrop. Of course, if you’re not familiar with how to photograph fireworks, there are some basic tips you’ll want...
More »

Why Top Photographers are Embracing Hard Light (And You Should, Too)
October 23, 2024
When it comes to lighting in photography, most of us instinctively reach for soft, flattering light. We diffuse our flashes, shoot through umbrellas, and seek out cloudy days. But what if I told you that some of the most striking portraits actually come from embracing hard light? That’s exactly what renowned photographer Roberto Valenzuela teaches in his groundbreaking new Dynamic...
More »
