Tips + Techniques
For Ben Shirk, the concept for “Orphan’s Odyssey” was an extension of a running theme in his personal work—that of a vintage circus-esque feel. “Undoubtedly, the most challenging part of this process is coming up with a unique concept,” he says. “There’s an equal amount, if not more, that goes into developing the idea as there is to creating the actual image.”
In search of inspiration, Shirk starts by creating a storyboard and fills it with color tones, lighting elements and other visual concepts he’d like to incorporate. Last year, he won second place in the Creative/Illustrative category for his image “Your Fortune Awaits,” featuring a young girl who is seemingly lost in an abandoned adventure park. Looking back at that storyboard, one image stood out from the rest. “It was of the Pied Piper marching down a road with a bunch of children behind him,” Shirk recalls. “His march was very pronounced…and that started me off on the path [for this image].”
ASSEMBLING THE SHOTS
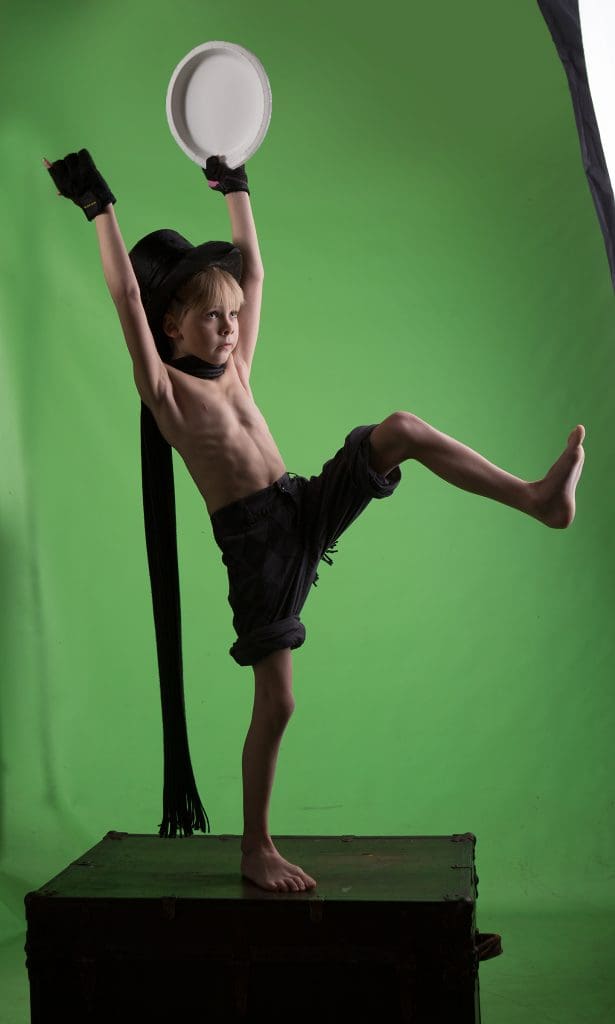
Shirk first photographed the human subject, his son, who he outfitted with tambourines and a costume “with a gypsy feel.” He then began digging through his collection of stock photographs, images he has collected from years of trips visiting zoos and other sites. The carriage, for example, was photographed at a pit stop he took during a road trip with his father. “It was a photographer’s playground,” he recalls. “I took pictures of planes, old cars, all kinds of random things, including this old circus wagon.”
Other elements, like the grass beneath the boy’s feet, were captured specifically for this image and took a little extra legwork to achieve. “I took a strobe outside and my son helped me hold the strobe up so that the grass was lit similarly to how we wanted it for the photo,” he recalls.
Look closely at the rhinoceros with the pack and you’ll see a birdcage hanging off a light stand. “I happened to have these things sitting in my studio,” Shirk says. “I thought it’d be fun to have an animal carrying extra items, so I took elements from my studio, stacked them on a green screen and it all just came together.”

Shirk took this photo he shot of a giraffe and, using the Puppet Warp tool in Photoshop, craned the neck and legs for more effect.
FINE-TUNING
Photoshop was the main post-processing tool that Shirk used to put the pieces of the image together. To manipulate the pose of the circus animals, he used the Puppet Warp tool. The giraffe was standing tall in his original photograph, for example, so Shirk “bent its neck over, turned its head a little bit and added a bend to its leg so it appeared to be walking up a mountain.”
To make each element look as though the lantern is the source of light in the image, Shirk did some dodging and burning on non-destructive layers to add highlights and shadows, respectively. “I have to make sure each element has that appropriate color balance and directional light,” he says. Using the non-destructive layers, he also adds curves and levels to fine-tune the shading. All in all, Shirk estimates the final image contains no less than 200 layers.
THE LAST DETAILS
Before coming to the final edit, Shirk created multiple versions of the image. The first version, he says, had a line of a few animals. The landscape was also simpler, “just skies,” he notes. “It didn’t have the story and depth I wanted it to contain. I want someone to look at this photograph and wonder, ‘Where are they going? Where are they coming from?’”
According to Shirk, photographers will often create images that present an obvious history and conclusion. “I want my artwork to capture an unexpected moment with a mysterious history of how the event came to be and to have an uncertain future, similar to peeking through a doorway at night and catching your child painted from head to toe in zebra stripes while dancing on their dresser to an audience of stuffed animals.”
To add that fantastical dimension, Shirk dug through his archives to find a photo he’d taken of mountains. He then applied some of his own fog and smoke brushes to create more depth. “It took a while to come up with the concept, but the depth it added was essential.“
Tips For Mastering The Green Screen
Don’t be afraid of the green screen.
It may have been difficult to use years ago, but things have changed. There’s a reason that Hollywood and special-effects producers use green screen—it’s quick and effective.
Avoid using flat light on your subjects.
Edge lights, or rim lights, will help define your subjects from the background and make it easier to extract them in post.
Be watchful of the amount of light you direct at the screen.
It will bounce back and cause green spill on your subject. Use a soft, even fill light to illuminate the background, and make sure the lights on the subject are not bouncing harshly off the screen.
Start by photographing your subject from the waist up.
Connecting a subject’s feet with the ground is often one of the more difficult parts of compositing. Photographing just the top half will make it slightly easier for extraction, and when you put them in front of a scene, you won’t have to worry about making that foot-to-ground connection.
Rangefinder also had a chance to speak with Shirk about creating standout senior composites—a topic he presented at WPPI 2017 in Las Vegas. Don’t miss the exclusive interview below.
Find Ben Shirk’s green-screen extraction action as well as his custom brush sets and templates at shirkphotography.com/photographers-arena.
Related: How to Shoot Portraits at Night with Off-Camera Flash
Flash Fanatic Amy Lombard on Creating with Punchy, Artificial Light


