First Exposure – Alien Skin Software’s Bokeh: Creative Soft-focus Effects
November 1, 2009
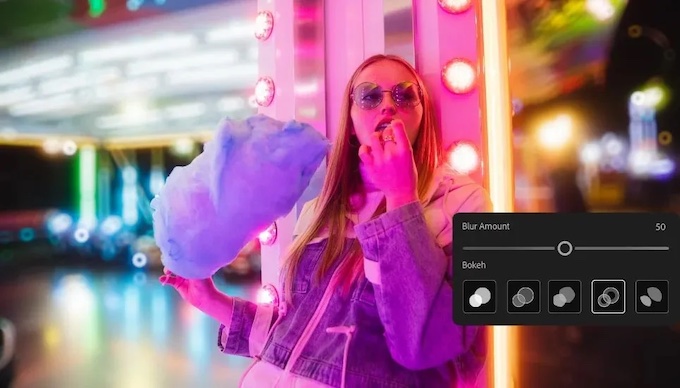
Alien Skin Software recently introduced an interesting Photoshop plug-in filter called Bokeh. Bokeh is a term that I had never heard before a few years ago. My dictionary defines it as “the visual quality of the out-of-focus areas of a photographic image.” I first came across the term when I was considering buying the Canon 85mm f/1.2L lens and read that it had good bokeh. This doesn’t simply mean that when you open the aperture all the way the background gets dramatically out of focus and blurry, drawing all the attention to the subject. It goes beyond that and considers how the out of focus highlights render, whether the shape of the aperture enhances the look of the blurry areas, etc.
If you have ever seen the donut-shaped, out-of-focus highlights produced by mirror telephoto lenses that were once popular, you have already been paying attention to bokeh. If you play around with a Lensbaby, too, you are getting tuned into bokeh. Certainly those using view camera lens movements to control the plane of focus are also tuning into bokeh.
So do you need a super fast telephoto, a Lensbaby or a view camera to add this dimension of control to your photography? No, people have been using Photoshop to simulate similar effects for a while. But now, with the introduction of Alien Skin Software’s Bokeh, it is simpler than ever. I found it particularly useful with portraits, although I also had some interesting results with city skylines.
When running Bokeh, the first decision to make is to choose your Focus Region method: Radial, Planar or None. For my purposes I generally found Radial to best match my purposes. I used it to simulate the look of a Holga, a Lensbaby or a Canon 85mm f/1.2L. I was interested in seeing some examples of using the Planar method and found some samples on the Alien Skin website. Actually, I was surprised and pleased to discover that most of its samples used the Planar mode. A good example of this was a pitcher throwing a ball. Using the Planar method Bokeh was applied just above the horizon line throwing the crowds in the stands out of focus. Of course, it was necessary for them to make a detailed selection of the pitcher so as not to blur him too. This application of Bokeh made it appear that a high-speed super-telephoto (perhaps a 600mm f/4) had been used.
I enjoyed using Bokeh and found that I could produce better results with it than by using Photoshop. Using Bokeh was more efficient than doing the equivalent blurs and masks manually, though not as much as one might hope because of the considerable processing time that Bokeh takes. It’s an important issue that needs to be addressed because with my dual-processor, recent-model, Intel-based Mac, the program took several minutes to complete all its calculations on a 50MB file. Of course, it isn’t necessary to wait for Bokeh and I found myself working on other projects while the program completed its calculations.
I have some actions sets from several vendors that include actions that do things similar to Bokeh. Bokeh is a superior method to any of these actions. One big advantage of Bokeh relative to any actions is that it provides excellent Preview capabilities. No guessing and hoping that the action will produce good results—you can see it in the Preview. Bokeh, unlike the actions I have used, does not constrain you to a circular sweet spot. Bokeh allows you to create an elliptical sweet spot for better control of what to blur.
Drag on the inner ellipse to change its size and specify the sweet spot. Do the same on the outer ellipse to change its size and specify how broad the transition zone will be. Click any of the four points where the inner crosshairs intersect the ellipse and drag to change the eccentricity and orientation of the ellipse (or to make it circular). Then experiment with the Bokeh Amount setting, the Aperture Controls, Highlight Controls and preview the results. Simple.
One feature that Alien Skin boasts about on its website is the Aperture Control. It can simulate the type of aperture that a lens has—circular, triangular, five blades, etc. It can also create heart-shaped background highlights with its heart-shaped aperture setting. It sounds hokey but the samples on the website make appropriate use of this gimmick and it’s likely to be popular with some engagement and wedding clients. Unless the highlights are bright and contrasty—specular—this control has little effect, much as the shape of the aperture on your lens is usually not something you can discern by looking at your photographs, unless there are specular highlights.
Another great design concept is that it allows you to specify three zones: a sweet spot, a middle region and an outer region. This allows great control over the smoothness of the transition. I discovered that it was critical to make the middle zone relatively large to allow a smooth transition from sharp to blurry. When this middle zone was too small, the transition looked unnatural.
Vignetting is another feature of Bokeh. At first, this might seem surprising: What do zone of focus and vignetting have in common? They are actually very much related. In a view camera, for example, as the lens is shifted, its ability to cover the film area is affected and that falloff can create vignetting. On the opposite extreme, in a toy camera, such as a Holga or a Diana, the sweet spot of the lens is where the image is both in focus and brightest. So, to simulate such an effect Bokeh is kind enough to provide ways to simulate both focus and brightness falloff. One nice thing about the Vignetting dialog is the preview—an advantage over using an action to do vignetting. However, the preview does take a while to respond with large files. And here’s another idea for the developers: Put the vignetting effect on a separate layer from the bokeh effect. That way you can adjust the opacity of each layer independently when tweaking the results of the filter.
In the screenshot (above) you can see an image of a model, Susan. The image was taken for her portfolio. I used a Canon 70–200mm f/2.8 IS USM lens shot wide open to concentrate all the attention on the model and blur the background. Then, with Bokeh, I exaggerated this effect even further.
In addition, I wanted to experiment with using Bokeh on a city skyline image. I used one of my stock Los Angeles skyline images—it’s tack sharp—to explore what Bokeh might allow me to do with the image. I experimented with Planar mode and discovered that it wasn’t a good way to simulate the effect of tilting a lens. When you tilt a view camera lens, the plane of focus skews relative to the film plane (sensor plane). One part of the image then becomes too close to the film plane to be in focus and the other part of the image is then too far from the film plane to be in focus, leaving only a narrow band in focus. Planar mode only allows you to create blur in a single direction, specifying a start and end point. So, it wasn’t exactly what I was looking for.
I discovered that I could use the Radial mode by making a large oval (elliptical) sweet spot, the cross sections within the image becoming almost vertical. I could then create a narrow band in focus and the falloff no longer looked radial, even though I was actually using that mode.
In one image of an old man playing the harmonica I used Bokeh to bring attention to the old man’s eyes, which seem to speak volumes. In another variation of the same image I used Bokeh to bring the attention to the man’s weathered hands, which told a similar story in a different way. It’s a good example of what you can use Bokeh to do.
On Alien Skin’s website, there are several samples of images that were manipulated with Bokeh and their application of it goes beyond the portraits and skyline that I have shown here. One image of a bird on a fence also required a careful selection and apparently employed neither the Planar nor Radial mode, but the third mode, None, to blur the entire background equally. Another one of the examples is of a city scene with flowers in the foreground and a blurry building in the background. So, the applications of Bokeh are available and quite expansive.
Bokeh is a great tool to have in the toolbox when it comes to adding an extra dramatic touch to an image and creating variety in the images that you deliver to
your clients.
Larry Brownstein is the photographer of the books Los Angeles, Where Anything is Possible and The Midnight Mission. He is represented by Getty Images, Alamy and other agencies. He has a growing wedding and portrait photography business. He also offers stock photography consulting and career coaching for emerging photographers. See his work at www.larrybrownstein.com or contact him at 310-815-1402.


