First Exposure: ON1 Photo 10
January 25, 2016
The release of ON1 Photo 10 brings major changes, not only to its name, but to the program and the modules it contains. First, the name: ON1 Photo 10 is the successor to onOne Perfect Photo Suite 9. The renaming marks significant changes in the look and use of the program, although underneath, much remains the same. As a long-time user, I found the changes disorienting initially, as I did with recent changes to Lightroom and Photoshop CC, but over time it gets easier. At least it doesn’t feel that Photo 10 is being “dumbed down” for new users like the Adobe programs, although the changes in Photo 10 will likely be appreciated more by new than by previous users.
ON1 Photo 10 is available for Mac and Windows computers and installs as a standalone as well as a plug-in for Lightroom, Photoshop, and Photoshop Elements. During installation you are given the option to leave your previous version, and to install Perfect Resize as a standalone program as well as having it available in Photo 10. I would recommend doing both of these options. After installation, Photo 10 is again available as a Photoshop Extension in the Window dropdown menu. Better yet, the Effects, Enhance, and Portrait modules are available from the Photoshop Filters menu where you would expect to find them. And no longer are any of the Photo 10 modules available from the File >Automate menu.
What’s New
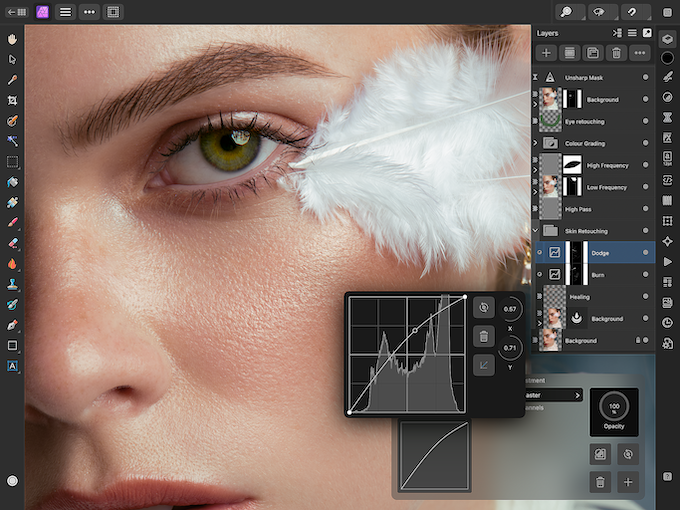
The most striking changes are those to the user interface. The tabs to modules are gone from the upper right of the workspaces and now appear in boxes in a “bumper” on the far right. Perfect Resize is now incorporated into the Export tool in each of the modules, or as a standalone if you chose that option during installation. The previous Black and White module is now a set of presets in the Effects module. This latter change turns out to be a good move as it allows other effects to be easily layered into a black-and-white conversion. The user interface overall looks cleaner and more up to date, particularly the Browser module. Significant changes under the hood are found in the Effects, Enhance, and Portrait modules. The supplied presets are now more manageable, and they can be edited and updated. The Filters panel on the left of the Effects workspace is much more intuitive. An icon in the upper right of each layer allows you to apply a layer mask, while the Overall Settings panel allows you to add a mask to the entire layer stack as well as adjust the overall opacity of the entire stack. The icons for adjustments in the Enhance module are replaced by sliders, à la Lightroom. The range of the adjustments has been increased, and now you can make negative adjustments as well as positive, as you can with Lightroom. The Portrait module, while not dramatically changed, now requires you to set control points for the eyes and mouth.
User Friendliness
Clearly, a lot of thought has been given to improving the user experience in ON1 Photo10. I think users would benefit from larger, more visible icons for the modules in the “bumper” on the right and the tools in the “bumper” on the left. There is an entire column available to them.

The resulting images from using Photo 10 are only limited by your vision and your time. Presets, tools, and adjustment options are available for seemingly every conceivable desired result.
What We Liked
For the most part, the new revised interface is an improvement. As I grow used to it, editing seems smoother and more logical. The move from clicking on icons to moving sliders in plus and minus directions in the Enhance module is very welcome. And the new arrangement of the presets in all modules, and being able to edit and save the edited preset is an important advance. Creating layers in the Effects module is vastly improved and the creation of a mask for each layer or for all layers in the stack is far more intuitive. The masking brush, which is unchanged, is still the best in the business.
What We Didn’t Like
While ON1 speaks of speed improvements, I’m not so sure. I experienced delays between moving the new sliders in the Enhance module and seeing the result in the preview, resulting in my attempting to move the slider again and really making a mess. And with the Highlights and Whites sliders I can never figure out where the white adjustment slider is against the white background of the slide bar. The Contrast and Detail sliders have the same problem but to a lesser extent. It’s cute to have the slide bars graduated in an appropriate tone, but it’s more productive to have white sliders on a dark background.
The Browser module redesign results in an Instagram-looking layout of square thumbnails. While it’s personal, I prefer seeing the actual images, not the images cropped to the default square shape. Fortunately, you can revert to actual thumbnails in the View menu of the Browser. And as with any new program installation, be sure to go through the preferences before you start work to be sure they are to your liking. For example, the default color space of Photo 10 is sRGB.
How It Compares
For those photographers looking for current Adobe-type browsing and editing without paying a monthly subscription fee, ON1 Photo 10 provides most of those capabilities. And for Adobe CC subscribers who are looking for portrait retouching tools, enhancing and effects presets, and simplifi ed masking, Photo 10 provides them with plug-in support in Lightroom, Photoshop CC and Elements. Add to that the superb tutorials on getting the most out of the program available from ON1, with a list price of $120, and ON1 Photo 10 is a serious image-editing contender.
Stan Sholik is a commercial/advertising photographer in Santa Ana, CA, specializing in still life and macro photography. His latest book, Shoot Macro, published by Amherst Media, is now available.


