
Lighting
Off-Camera Flash: 5 Techniques for Dramatic Portraits
March 4, 2021


Sean Lara is a wedding and portrait photographer based in Fort Collins, Colorado. He is an educator within the portrait photography industry (including at our conference, WPPI), a MagMod ambassador, and is ranked one of the top ten artistic photographers in the world by the Wedding Photojournalist Association. His five off-camera flash photography techniques presented here will help you create dramatic portraits in any environment.
Photographers know better than anyone that lighting conditions are constantly changing—the sun may be too bright and creating unflattering shadows, or perhaps it’s nighttime and there’s not any light at all. Regardless of the challenges, the last thing you want to say to a client is “Sorry, but the light here is really bad and I can’t work with it.” So what do you do in a situation where you’re struggling to work in less than ideal lighting conditions, or frankly just can’t think of ways to get creative? Consider off-camera flash photography.
To be frank, off-camera flash can be confusing and sometimes overwhelming to get just right. But with practice and patience, it’s something that you can successfully introduce into your workflow without investing a ton of money. And if you get it right, you’ll be able to create stunning images in any environment that set you apart from the competition. Presented here are five specific off-camera flash techniques that are easy to incorporate into any photography workflow. Even better, these are strategies I use at almost all of my weddings and portrait sessions that are quick and easy enough to recreate with minimal equipment.
[Read: How to Freeze Rain with Off-Camera Flash]
1. USE OFF-CAMERA FLASH TO BALANCE VARIANCES IN EXPOSURE
In many situations, especially when capturing photos outdoors, you’ll experience variances in exposure between your subject and the surrounding scene. A variance in exposure occurs when the light on your subject doesn’t match the light in the background or in the highlights of the sky. A common example of when this might occur is during sunset. If your intent is to bring out the natural colors in the sky, you’ll find that if you expose for the highlights in the sky, your subject will be underexposed. If you try to expose for the light on your subject, your background will likely be blown out. So what do you do to create a properly balanced photo? Use off-camera flash!

You’ll want to first take an in-camera light meter reading of the highlights in the sky. Based on this feedback, set your aperture, shutter and ISO values accordingly so the brightest areas are exposed properly. From here, you can then introduce flash onto your subject(s). The amount of power needed will depend on how powerful the unit is, distance to subject and how much ambient light in the scene you are working against. But, a general rule of thumb is this: more ambient light = more flash power required; less ambient light = less flash power required. Capture a few test images until you get the desired results, then shoot away! This technique will work in almost any situation when balancing exposures between the ambient light and your flash.
[Read: The Off-Camera Flash Handbook by Vanessa Joy]
2. BACKLIGHTING WITH OFF-CAMERA FLASH
If you’re looking for a really easy way to impress your clients, backlighting will make your images “pop” to help create something unique. I commonly use this technique to accomplish three things: create a strong burst of light behind a person or couple, separate them from a busy or dark background, or to illuminate stimuli in the air such as snow, rain, or smoke. As the name suggests, backlighting is achieved by placing a flash behind your subject(s). Depending on the application, you may then choose to modify the light to help set the tone of the image. I personally like MagMod modifiers as they give me the flexibility to quickly change the behavior of my light. For example, if I want my flash to spill everywhere and create something bright and dramatic, I may use a MagSphere. If I want a more controlled beam of light, I might use a MagGrid.
3. CREATE SILHOUETTES BY PLACING AN OFF-CAMERA FLASH BEHIND YOUR SUBJECTS


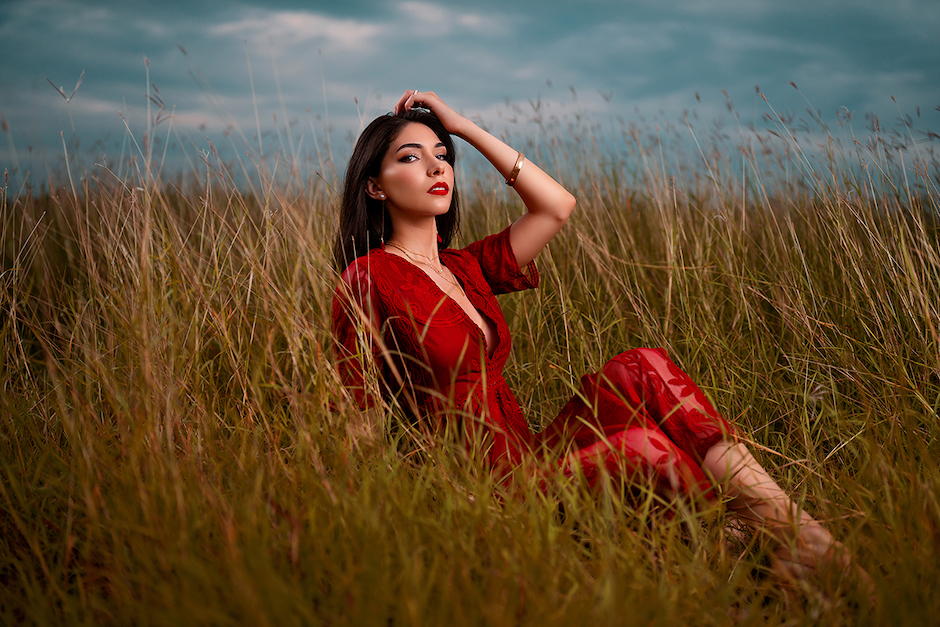
© Sean Lara
Technically speaking, silhouettes are also created by implementing backlighting techniques. However, I love incorporating them so much into my photography that I feel as though they deserve their own category. Most people generally associate creating silhouettes synonymously with sunsets, but with off-camera flash, you can create your own dramatic images in almost any situation. It’s quite simple to create a silhouette; you just need a low-lit area, a powerful flash, and either a flat wall or dark background.
There are two ways to create a silhouette. The first method is to find a dark background and point a flash at your subject(s). As long as there’s no ambient light around or any walls for your flash to bounce on, you’ll create a thin highlight around the profile of the person(s) you’re photographing. Through trial and error, I’ve found this technique is best done with a MagMod MagGrid, which helps prevent light spill. It’s also important to note that in order to properly pull off this photo, you want to intentionally obstruct your line of sight with the flash by placing your subject(s) in front of it so the flash head doesn’t show up in your final image.
The second method is to find a wall or flat surface and create a strong highlight using your flash. From there, you’ll want to place your subject(s) directly in front of the light. Using high flash power is important here, as you need a strong enough burst of light to underexpose your subject(s) and create that contrast-rich, black profile that is commonly associated with a silhouette.
4. USE COLORED GELS

© Sean Lara

© Sean Lara
Have you ever been to the theater or a Broadway show and witnessed the colorful lighting on stage? That light is being created by stage lights that are “gelled” with a variety of colors to help set the mood. With colored gels, you can do the same thing with your flash units to create dynamic images.
There are two types of gels I commonly use: creative/artistic gels that put out a specific color of light, and color-correcting gels that help correct variances in color temperature or allow to shift the color of ambient light while maintaining a proper color balance on a subject.
[Read: A Complete Guide to Color-Effect Gels in Portrait Photography]
With these gels, you can add a pop of color to any scene. Point your flash on a backdrop, direct it towards a foreground element, create a rim light—the possibilities for creativity are endless. These colored gels are best used in dark settings to really make them stand out, but they can certainly be used in a variety of situations.
Alternatively, there are also color-balancing gels available on the market as well. I commonly use CTO and CTB gels for the purpose of color shifting. By adjusting your white balance and using a CTO (Color Temperature Orange) gel, you can effectively change the color of your ambient light to blue, and by using a CTB (Color Temperature Blue) gel, you can change the color of our ambient light to orange. This is a great technique to use when you’re trying to add dramatic colors to the sky without having to spend too much time in post-production.
5. GET CREATIVE WITH PRECISION LIGHTING

© Sean Lara
One of the most unique ways you can get creative with flash is through precision lighting. To be specific, this is placing light in a specific area to illuminate and draw attention to the subject. This is a fantastic way of separating your photos from other photographers, even those also using OCF. The most effective way to precisely direct your light is by utilizing a snoot or grid. I personally enjoy using the MagMod MagGrid as it’s portable and extremely easy to use. Using this technique works in a variety of situations, but it’s great for capturing environmental portraits or capturing wide perspectives. While it can be challenging to always hit your mark, the images you produce can be stunning.
Related Articles
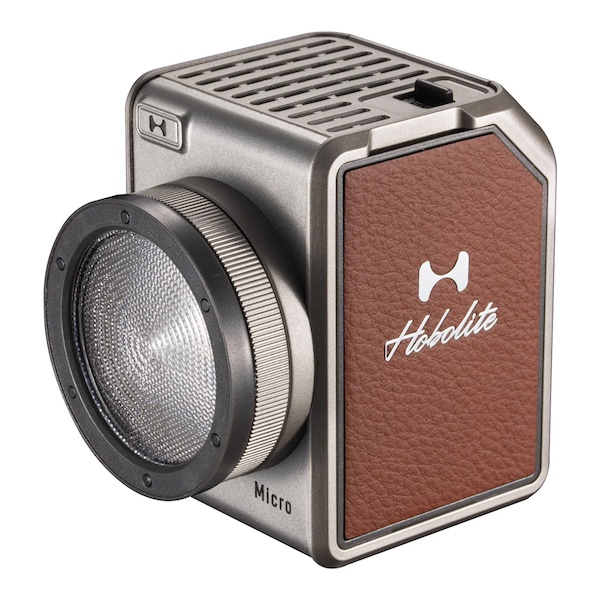
The Hobolite Micro—Perfection in a Pint-Sized Package
September 26, 2023
Form and function are perfectly matched with Hobolite’s latest release, the Hobolite Micro. This diminutive, bi-color, battery-powered LED light takes some of its cues from the company’s larger, more powerful siblings but doesn’t skimp on features. Yet it’s small enough to fit in the palm of your hand—or anywhere other lights are too bulky to fit, a special bonus for...
More »
How Francisco Joel Hernandez Adds Depth to His Portraits
March 6, 2023
WPPI 2023 speaker Francisco Joel Hernandez has been a fan of off camera flash for over a decade and loves sharing his process on social media.
More »
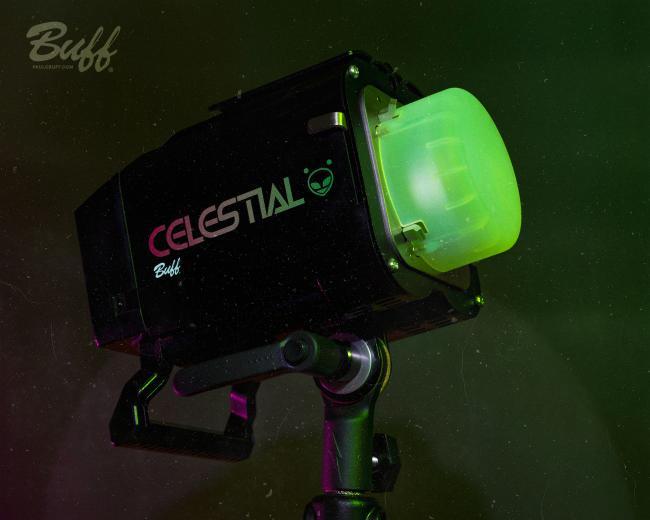
Paul C. Buff’s Celestial is a Powerful Battery-Powered Strobe
January 5, 2023
Lighting Company Paul C. Buff is best known for its studio lights—such as the Alien Bees and Einstein—but the company’s latest strobe is entirely battery powered. Arriving on Jan. 20, the Celestial is a battery-powered flash with up to 500 Ws of power and features like High Speed Sync. The Celestial: Battery Power Paul C. Buff’s Celestial delivers up to...
More »
